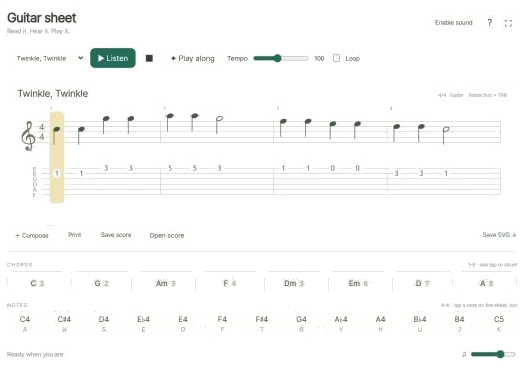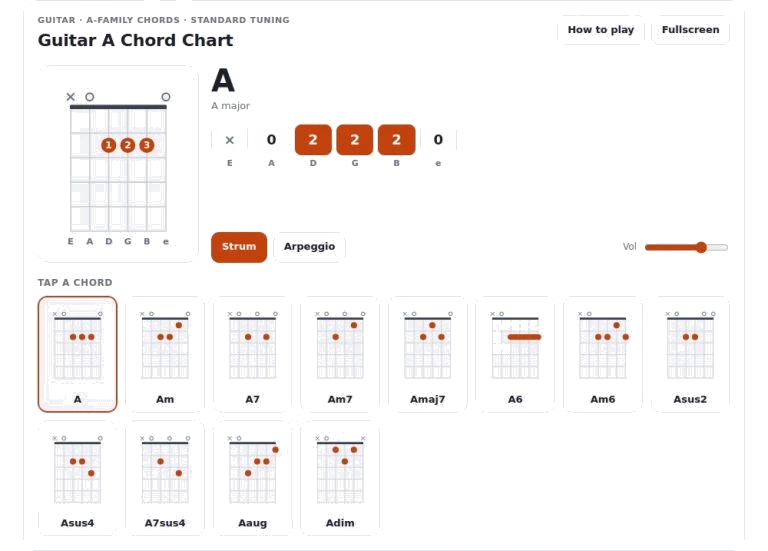
This is an interactive chord chart that lets you learn guitar chords fast and precisly. Play it with your fingers by using a mouse or touching the screen. Play it with your keys on computer to learn faster. Then, listen to the widget play back how the chord sounds while seeing it visually with both tab notation and a diagram.
It features the A family of chords in standard tuning. By focusing on the most common chords used in any progression, it provide a focused library to help you get up to speed with common progressions.
How to Use the Guitar Chord Chart
It revolves around a big chord diagram that changes according to which variation of the chord you choose. To the left is a grid of smaller chord box. Tap on one of these to add the chord to the main diagram. This will instantly update the tablature display beneath it with correct notes and adjust the fingering chart to match.
If you want to move from one chord to another without picking up the mouse, then simply use your computer keyboard’s left/right arrow keys to scroll back and forth. This lets you keep your fingers close to the typing area but easily move through list of possibilities.
Looking below the main chord name are six boxes. These represent each string on the guitar. On this line, you’ll notice tab notation. A number indicates the fret you should place your finger on; zero means ‘play open’ (on that particular string). The X symbol is placed here if you’re not supposed to strum that string but instead should mute it.
You can use this as a visual aid to help double check your finger positions before attempting to play along. The numbers inside the dots on the diagram shows which fingers to use: 1 is the index finger and 4 is the pinky.
The buttons underneath the row of tabs control audio playback. The Strum button (below) plays all active strings on a rapid-fire stroke so you can confirm the overall resonance of your chosen chord shape. Or, press Arpeggio to hear each string picked one at a time, lowest-to-highest, which will alert you to any buzzing notes or muted string you may have overlooked when playing it as a full strum. Next to these buttons is a volume slider, and remember: Keep it at a comfortabley level if you’re practicing around others.
The top controls have been designed with navigation and accessibility in mind. To give you a little extra space on smaller devices (or just if you need to focus strictly on practice), you’ll see a Fullscreen button. This maximizes the widget to full-screen size, giving it more space for diagrams. If you occasionally forget what to look for in the diagrams (X marks mean mutes; circles indicate open strings), there’s a How to play button. You can click it to turn on a help panel that walks you through the visual cues used in the diagrams. There is also a question mark key you can hit on your keyboard to turn this help text on/off without needing to reach for the mouse.
Using both sound and sight will give you a better experience here. Press Strum to hear all active strings played together in a quick burst, and look up to see if correct strings are shown in the tab row. Use the Arpeggio function if certain chord changes is giving you trouble. This isolates the tricky parts for you so that you can concentrate on training your fingers. To develop muscle memory, it may be worth muting your actual guitar as you learn to play along with the sounds from this tool.
Keyboard shortcuts allow you to easily cycle from A major to minor, seventh, suspended etc., so you don’t have to break concentration. It works with the reduced motion setting on most operating systems so that animations doesn’t take away from what is being shown. It will also automatically switch into a dark mode version if your system is set up this way, making the high-contrast design easy to read in low-light conditions.
Chords are displayed in simple barre or open position versions appropriate for intermediate players. Unfortunatly, there is no transpose option which means the pitches stay stuck in their standard tuning. The emphasis here is on good fingering rather than any kind of theoretical adjustment.
To begin, choose any chord on the grid, then follow the tab numbers across to see if they match the labels on the strings below the diagram. Hit the Strum button to set a sound in your ears to use as a reference then hit the Arpeggio button to make sure every note rings out clearly. The arrow keys lets you travel through the various voicings available for the A family of chords.
Remember this isn’t a practice aid designed to replace learning but to supplement it. Have fun changing quickly from chord to chord and seeing which ones work best for you. Take your time and enjoy the exploration.