This online drum sequencer allows you to create beats right inside your browser. Just click on the grid with your mouse to use the sequencer or use some quick keyboard shortcuts for quicker control. It’s essentially a simple 16-step pattern generator, which means you can program rhythms for seven drum sounds at a time. It’s super easy to get started making grooves and doesn’t require any audio files or external software to use.
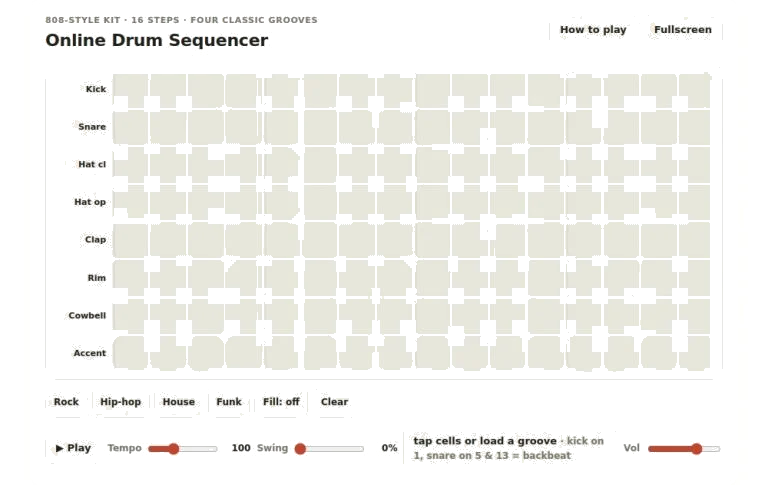
At its heart, it’s a grid consisting of rows (instruments) and columns (time). The columns has sixteen steps, each corresponding to sixteenth notes in a regular four-four measure. Columns can be toggled on or off by clicking any cell. If you click a cell containing one of the seven available drum sounds, it will play that sound at the selected point in the sequence. Alternatively, you can click on the name of any of the instrument rows, which mutes/unmutes the whole row. This lets you isolate certain parts of your beat as you’re arranging the rest of the element.
How to Use the Online Drum Sequencer
This is the transport section. Below the grid is the transport section, which controls playback and timing. To play the sequence, click the Play button or press the space bar on your keyboard to turn it on/off. The Tempo slider sets the number of beats per minute. The default tempo is set at a hundred beats per minute. You can adjust this from sixty to one hundred eighty. For more relaxed jamming sessions, slower tempos works best, while faster tempos are better suited to high-energy electronic styles.
The Swing slider introduces a subtle delay to each second sixteenth note. It’s the feel you get when a real-time drummer drags slightly behind the beat. For funk or hip-hop patterns, increasing the swing amount works really well to give them a laid-back groove.
The master volume slider is in the transport section. It controls how loud everything plays back.
Remember, this isn’t a sampler with pre-recorded samples; it’s a drum machine built to synthesize its sounds in real-time via digital oscillators and filters. No samples is loaded on board. The kick is a low-frequency sine wave with a pitch envelope. The snare is a combination of a triangle wave and filtered noise. The hi-hats is created from noise sources run through high-pass filters. This method of synthesis ensures low latency when you trigger hits and also keeps the files super small.
Below the grid is the Accent row; here you can add dynamics to your pattern. The row is amber-colored, and clicking in a cell increase the volume of the corresponding step by about half. It’s great for bringing out the syncopation or backbeat, for example. Add some expressiveness and make the rhythm punchier.
Below the grid are buttons to load presets. Templates include Funk, House, Hip-Hop and Rock rhythms. Each loads an entire rhythm arrangement, including the right swing amount. Hit Fill to turn on a snare roll on the final four steps, ideal to build up the tension ahead of a section change or chorus.
The best way to use this sequencer is to build the pattern from scratch. Place the Kick drum on beat one, the Snare on the backbeats, fill in the Hi-Hat to keep time and add some percussion (Claps, Cowbells etc.) for textural interest. Try using the mute function to test the feel of each instrument in the mix. Is it cluttering the pattern? Remove a couple of hits and let the rhythm breathe. Drum machines is a case where less is often more.
While playing the sequence you can also edit the grid so you will hear the change straight away. If you forgot what the keys do, there’s a help button as well as a question mark key you can press to turn on the guides. It’ll change its look based off your operating system preferences. It also supports dark mode. There is also an option to go full screen which gives you more space to work. Play around with the swing settings and tempo to try things that matches your musical preference.
In the end, it should of been a tool where you can have some fun making rhythms without any technical hurdles getting in the way. Begin with a preset, press play and tweak each cell individually. Pretty soon you’ll understand how subtle changes can make a huge difference in a beat turning into a groove. Have fun sequencing your beats.